Creating a Custom Audience in Audience Manager
A Custom Audience leverages your first-party CRM data (i.e. an email hash or mobile identifier) and matches it to email readers across our email exchange. With Audience Manager, you can onboard your CRM data to target your existing customers or suppress existing customers from your acquisition campaigns.
How to Create a Custom Audience
Step 1: Format your audience file.
- Only 1 column.
- No titles, column labels, or other text. The first row should start with the first ID (email, hashed email, or MAID).
- Only 1 ID per line.
- No uppercase letters.
No salted hashes.- No extra spaces or special characters.
- No spaces before or after the ID.
- Remove any and all formatting.
|
Example of a BAD hash that includes spaces: E 0aa4dc853af 291878b37984863655e7 Example of a GOOD and proper hash: e0aa4dc853af291878b37984863655e7 |
Note: if uploading hashed emails, please make sure your hashes follow the required character length:
- MD5 hash is 32 characters.
- SHA-1 hash is 40 characters.
- SHA-256 hash is 64 characters.
Step 2: Create the audience in Audience Manager.
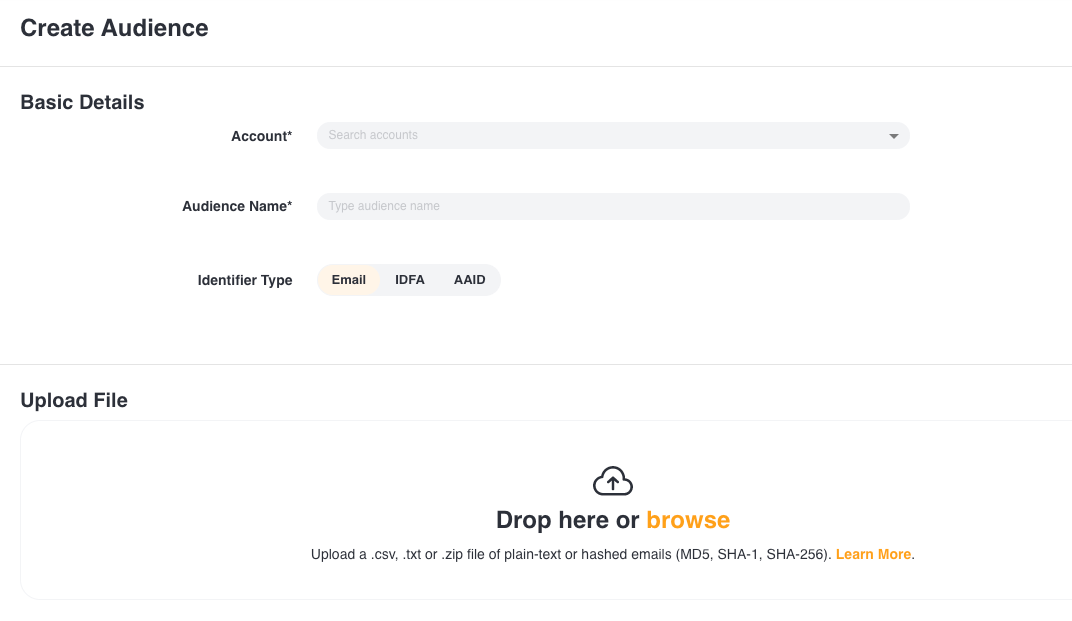
- Click “Create Audience” and select “Custom Audience” in the dropdown. You’ll be taken to another screen.
- In the next window, select the account and name your audience.
Select the identifier type: email, IDFA (iOS IDs), or AAID (Android IDs).
Then you can drop or browse for your file. Click “Create Audience” when you’re done.

You will see a progress window on the bottom right corner of your screen. An email will be sent to you when the audience has finished uploading. *You may see an Ineligible status when you first upload the audience.*
For managed service campaigns, please notify your account team that the audience has been created so that they can begin targeting the audience.
How to Edit a Custom Audience
Step 1: Click on the audience you want to edit.
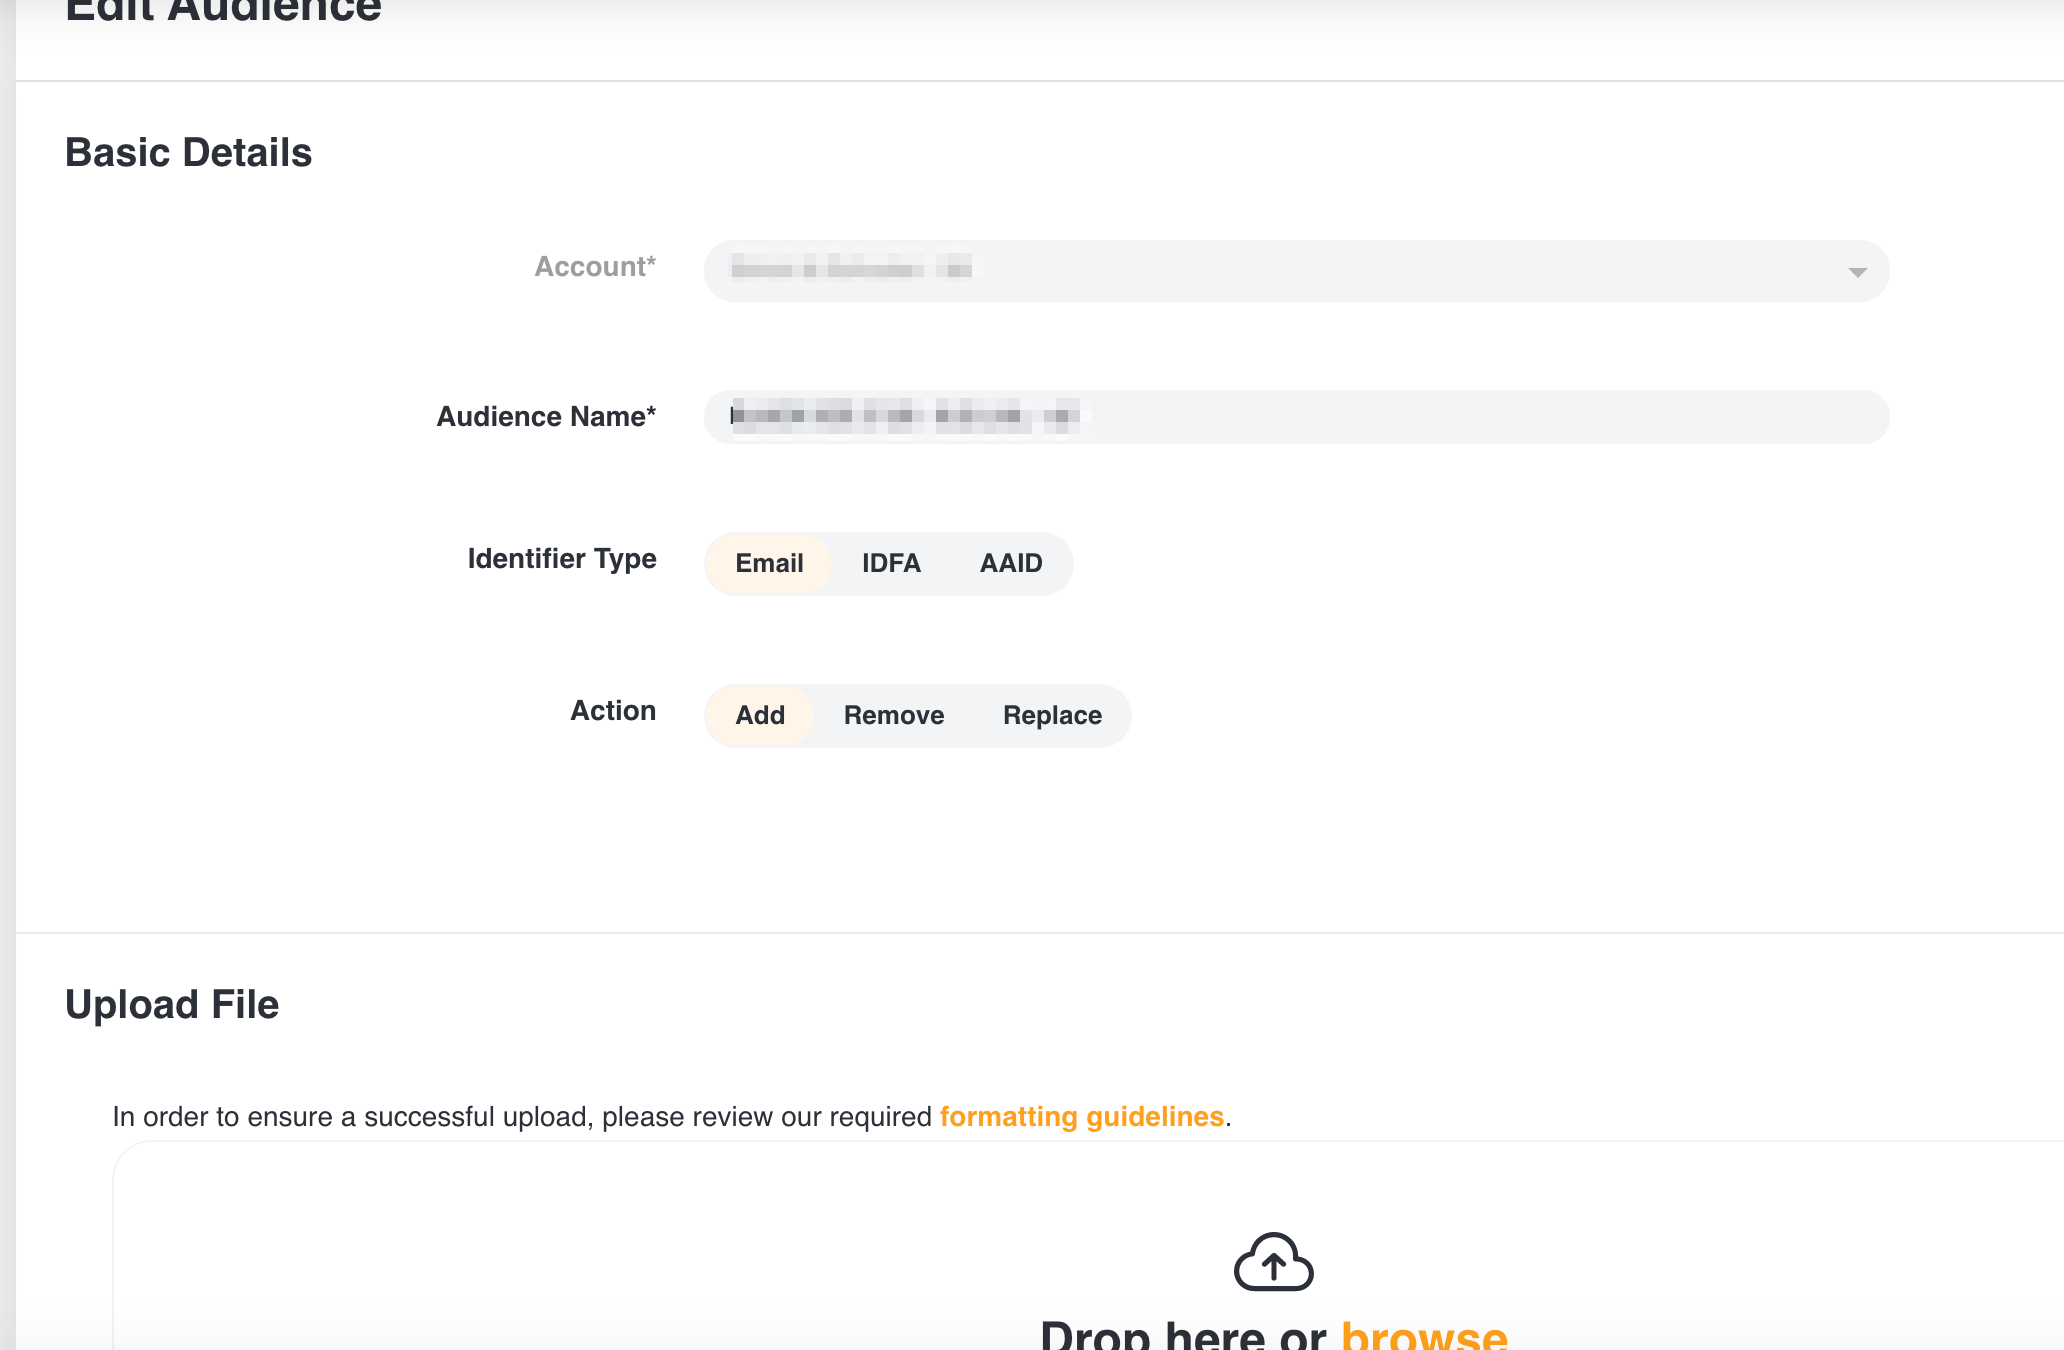
This will open up a side panel where you can click on the edit button on the top right of the panel to open the audience details.
You’ll be taken to the edit form where you can edit the name, add/remove individual MAIDs or emails to your audience, or replace the audience file entirely.
Best Practices
Email addresses: We recommend uploading raw (plain text) email addresses. Audience Manager will automatically and securely hash the email addresses into all three formats.
Audience size: Larger customer files will produce higher match rates. While the best-performing audiences contain at least 1MM email addresses, you can run campaigns with smaller segments if needed.
