Google Tag Manager – LiveConnect Implementation Instructions
Update Your Data Variables
If you have multiple data variables that you want to track or optimize to or are leveraging Dynamic Product ads (e.g. selling different items and different prices, creating an audience segment based on category name etc.), you can make the value dynamic.
First, you will have to check to make sure that the required data variables are present in the variables section found on the left hand side navigation bar of the GTM dashboard.
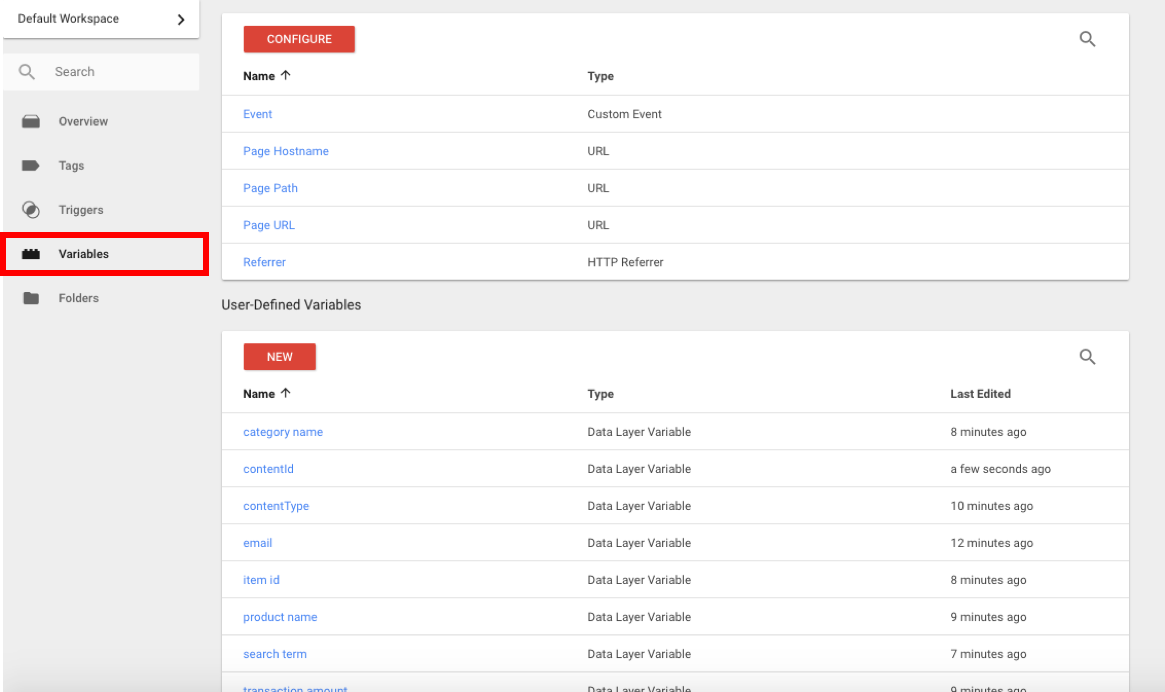
Data Layer Variables Email Sign-Up
- Customer Email
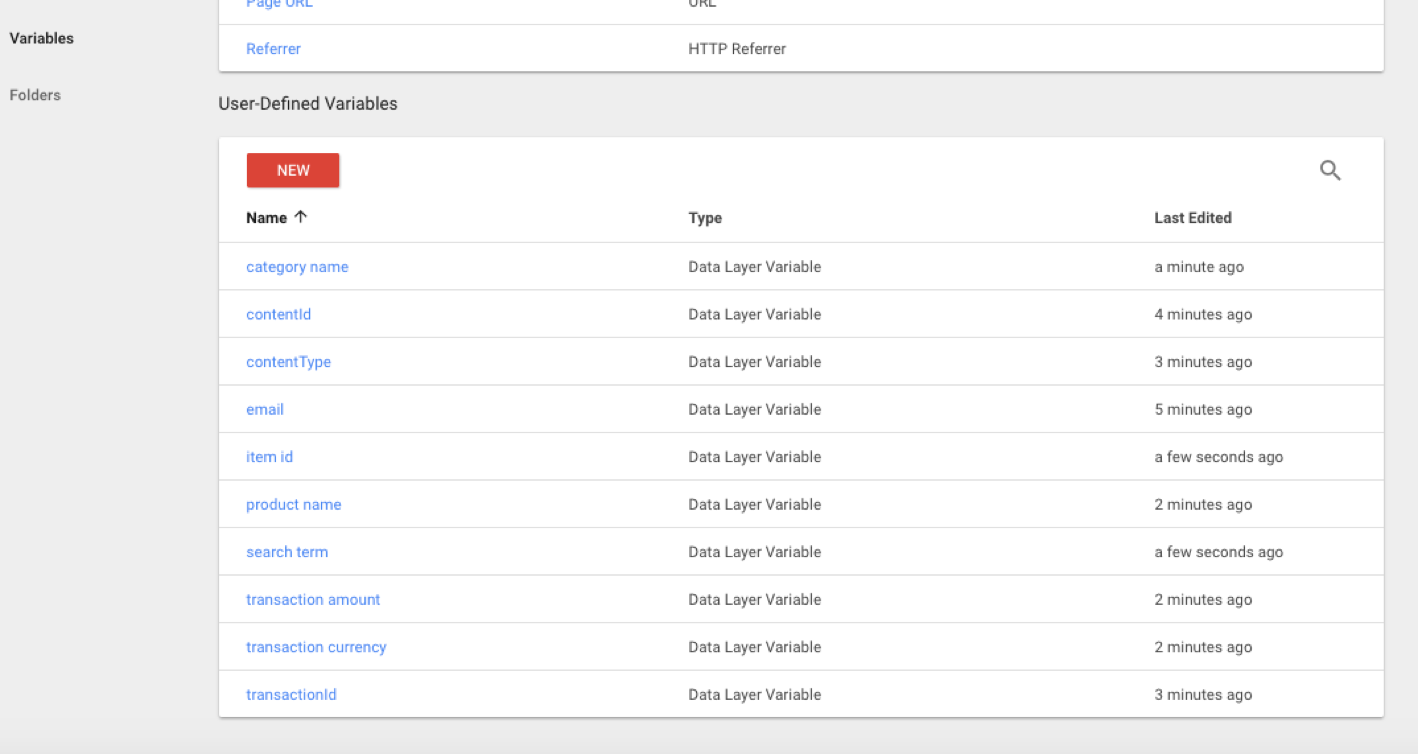
Data Layer Variables for Product Purchase
- Customer Email
- Transaction ID
- Purchase amount (total)
- Product price
- Item ids
- Product quantity
- Currency
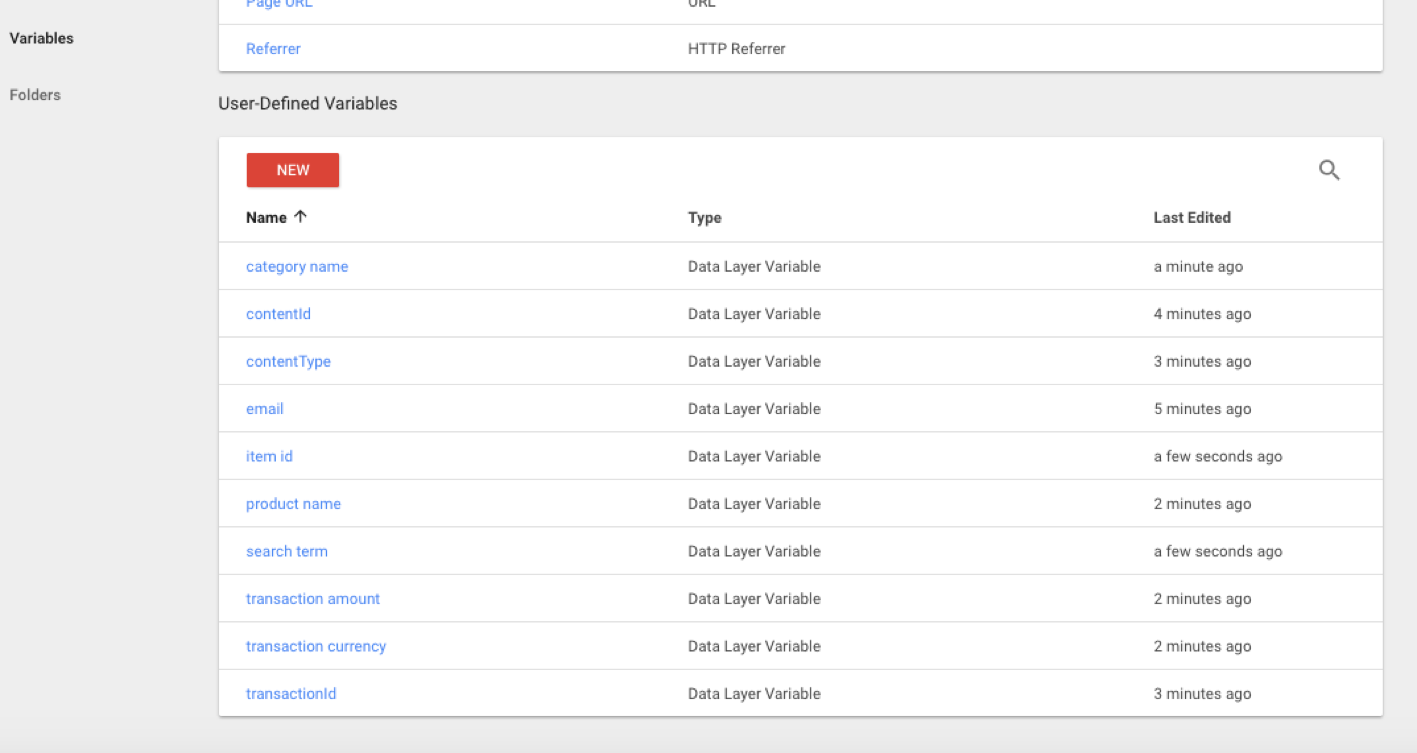
Data Layer Variables for Dynamic Product Marketing
For ALL Event types
- Customer email
For Category page
- Category Name
- Item IDs
For Search Page
- Search Item
- Item IDs
For Product Page
- Product name
- Product ID
For Add to Cart
- Product name
- Items
For Purchase
- Transaction ID
- Purchase amount (total)
- Product price
- Product Id
- Product quantity
- Currency
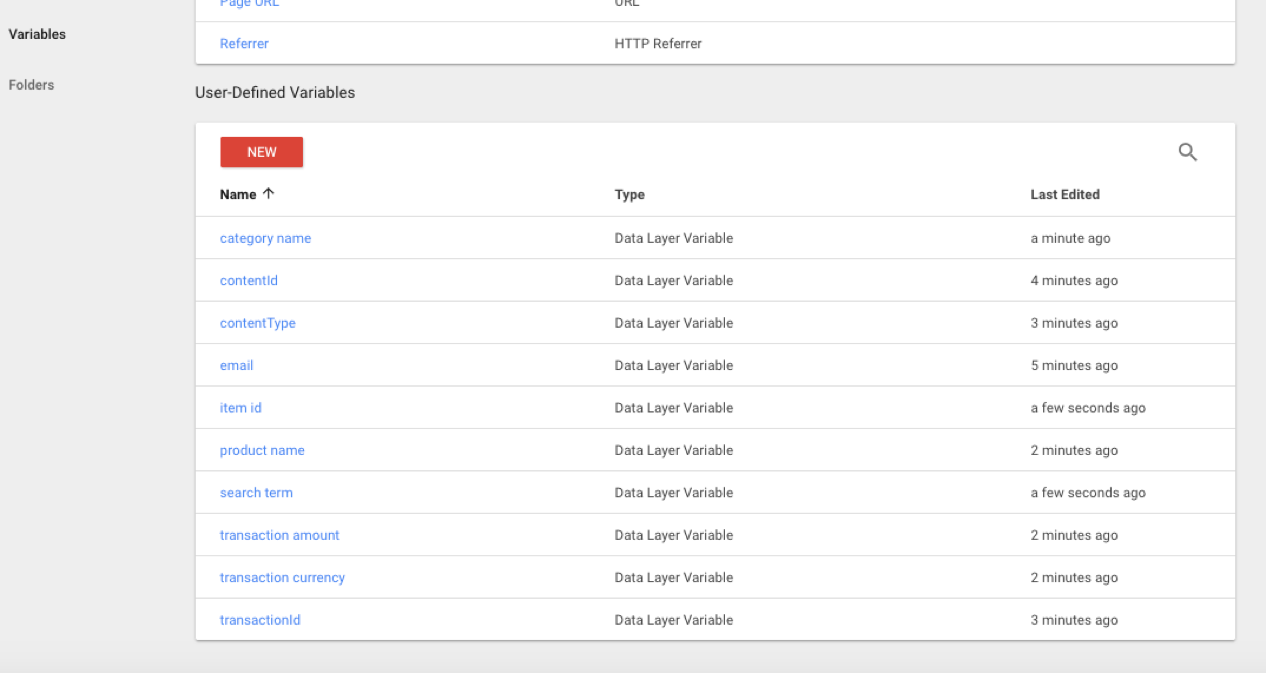
LiveConnect Tag (Base) Implementation
|
💡Please note, the LiveConnect Base script must be set up ahead of all other remarketing extensions or conversion pixels. Instructions and respective screenshots below. |
1. Log in to GTM
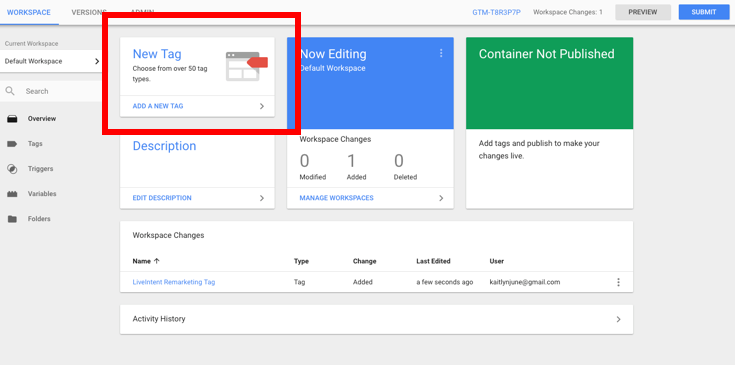
2. Select “New Tag”
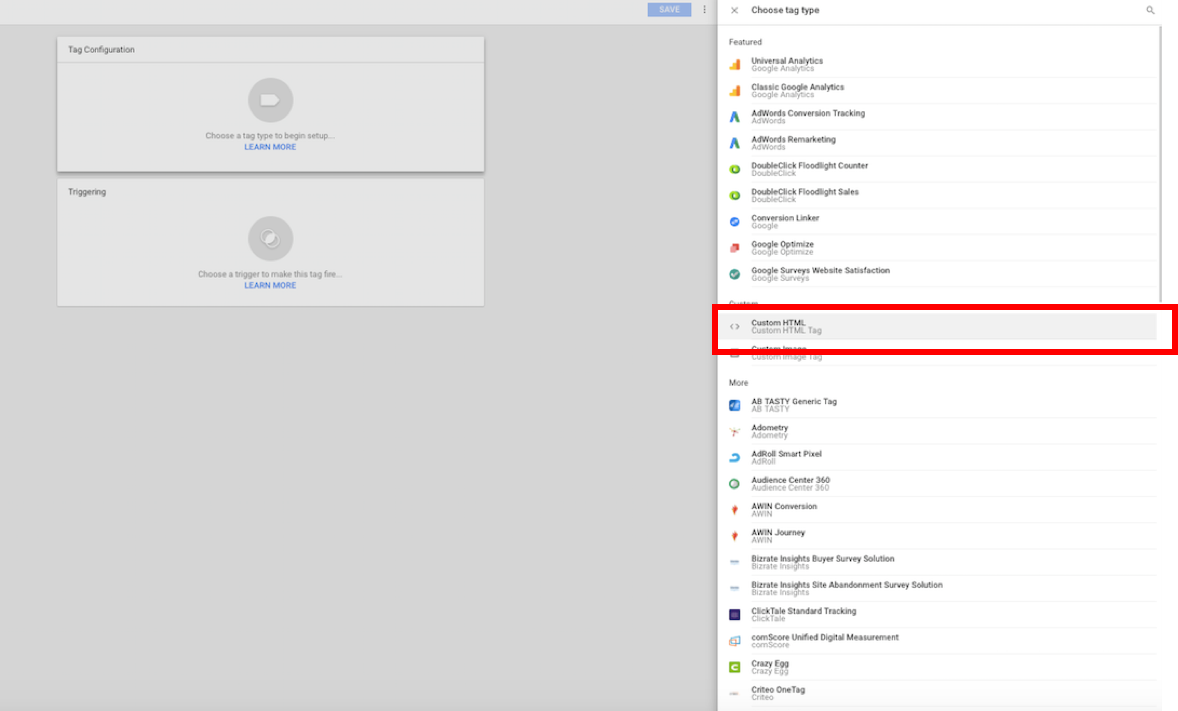
3. Select Custom HTML tag type
4. Paste the LiveConnect Tag into the custom HTML container
5. Under the “Firing Triggers” section, select “Page View” as Trigger Type
6. Select “All Pages”
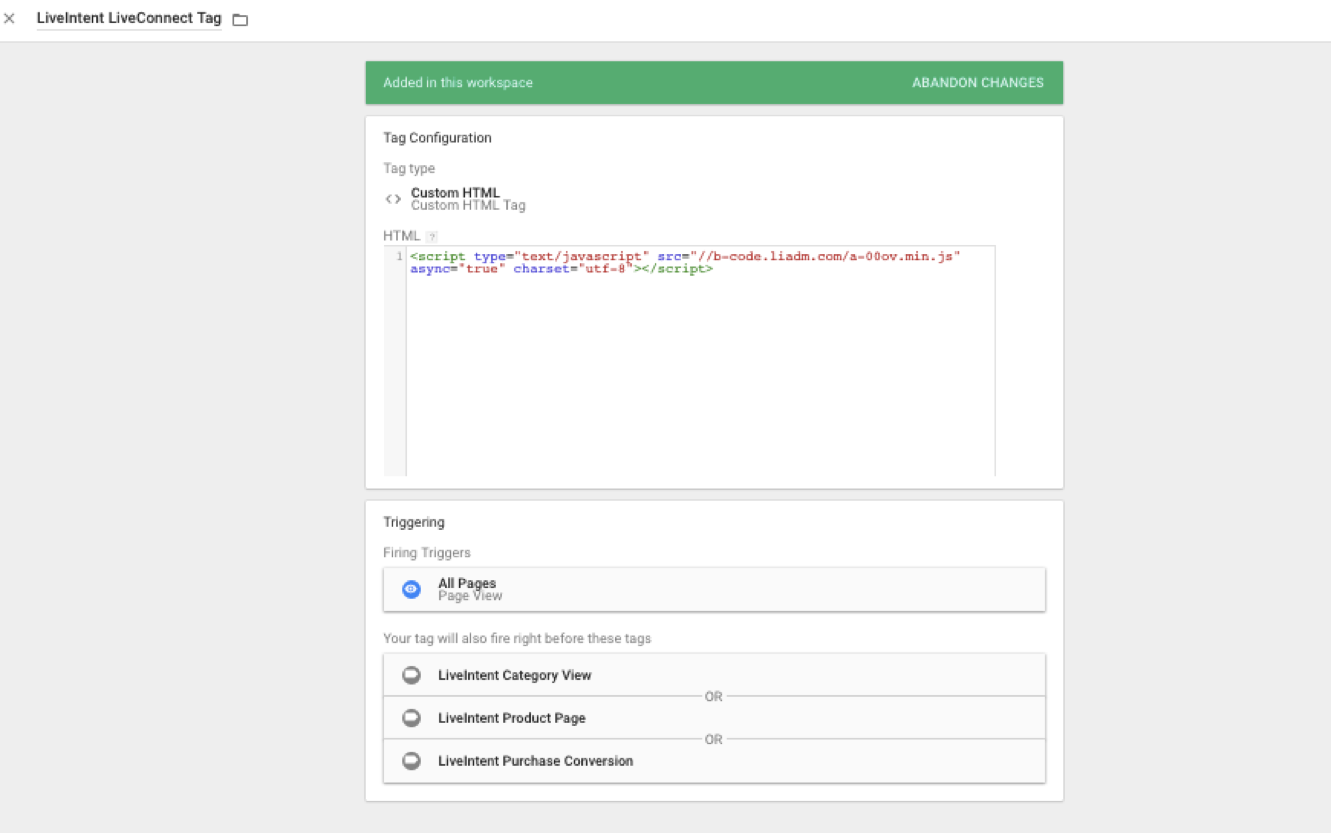
7. Save
LiveConnect: Email Sign-Up
1. Repeat steps 2-3 from previous section, LiveConnect Tag (Base) Implementation (Create new tag & select custom HTML on right hand side)
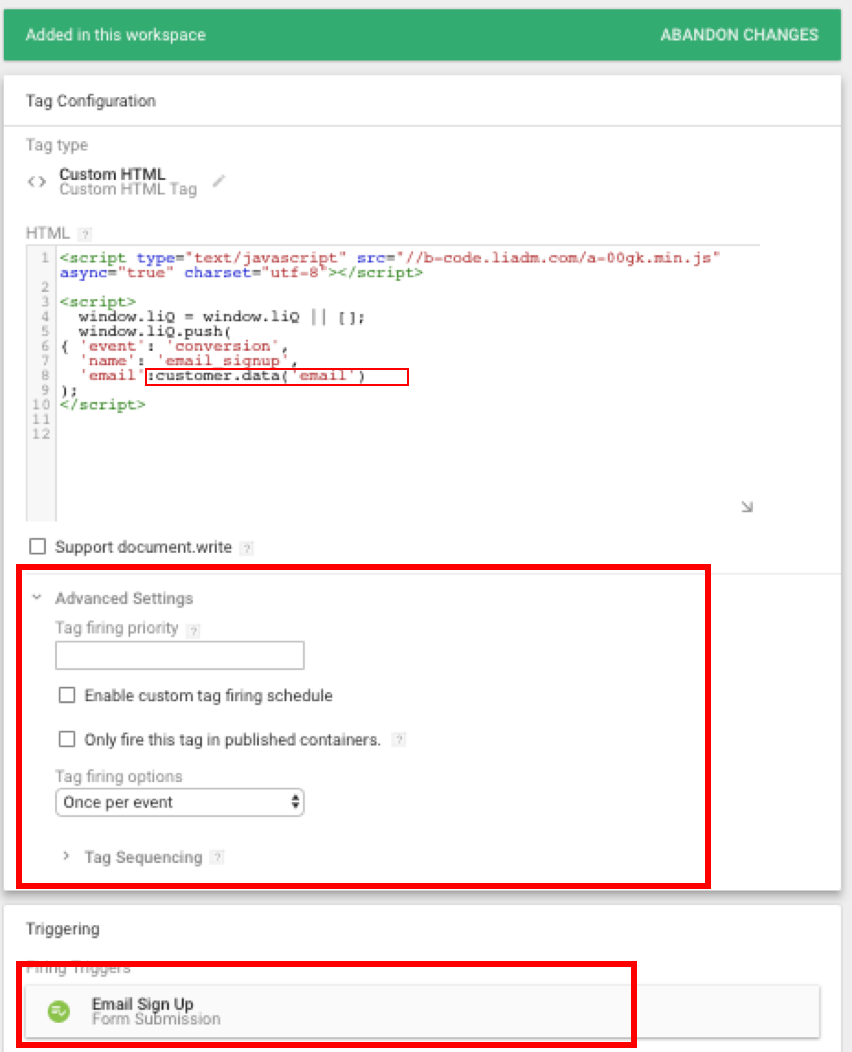
2.Paste the Email Sign Up Conversion Extension into the custom HTML container
- Please note that the highlighted fields (red box under HTML section) will need to be updated to reflect your data layer variables.
- ‘email’
3. Under the “Advanced Settings,” navigate to tag sequencing
4. Select “Fire a tag before LiveIntent Email Sign Up fires”
5. Choose ‘LiveIntent LiveConnect tag’ so that the Email sign up extension fires AFTER the base LiveConnect Tag.
6. Under the Triggering section:
- Select Page View as Trigger Type
- Include logic so the tag only fires on the email sign up event
LiveConnect: Product Page
1. Repeat steps 2-3 from previous section, LiveConnect Tag (Base) Implementation (Create new tag & select custom HTML on right hand side)
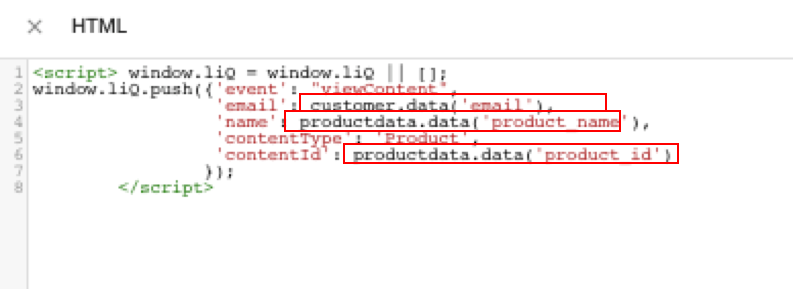
2.Paste the Purchase Conversion Extension into the custom HTML container
- Please note that the highlighted fields (red box under HTML section) will need to be updated to reflect your data layer variables:
- contentType: accepted values are ”Product”, LandingPage”, “Article”, “Product”,”Hotel”, “Flight”, “Destination”. If your data layers are not set to populate these values verbatim, feel free to hardcode.
- ‘email’= customer email address
- ‘name’= [product name or custom value]
- ‘contentId’ =“Product id” //pass as a string
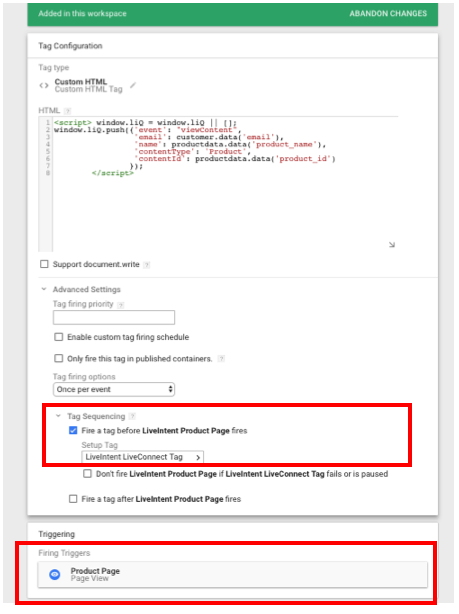
3. Under “Advanced Settings,”scroll down to the “Tag Sequencing” section
4. Select checkbox next to “Fire a tag before LiveIntent Product Page fires” so that the Email sign up extension fires AFTER the base LiveConnect Tag.
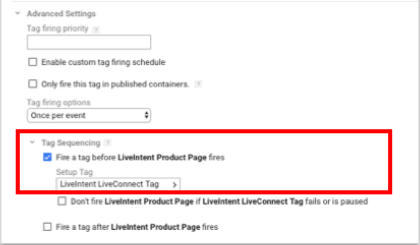
5. Choose “LiveIntent LiveConnect tag”
6. Under the Triggering section
- Select Page View as Trigger Type
- Include logic so the tag only fires on ALL PRODUCT PAGES
LiveConnect: Product Purchase/Confirmation
1. Repeat steps 2-3 from previous section, LiveConnect Tag (Base) Implementation (Create new tag & select custom HTML on right hand side)
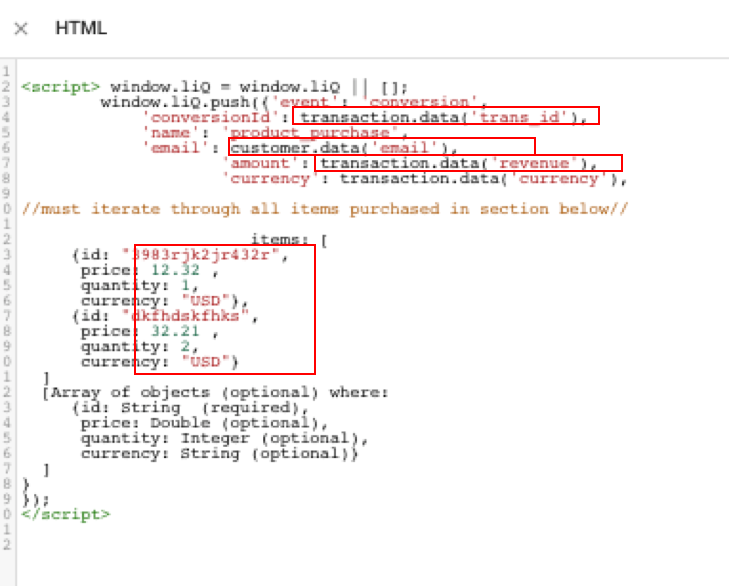
2. Paste the Purchase Conversion Extension into the custom HTML container
- Please note that the highlighted fields (red box under HTML section) will need to be updated to reflect your data layer variables.
- ‘conversionId= transactionid
- ‘email’= customer email address
- ‘amount’= purchase amount
- ‘contentId’=product id
- ‘currency’=currency
- ‘id’=product id (in array)
3. Under “Advanced Settings,” scroll down to the “Tag Sequencing” section
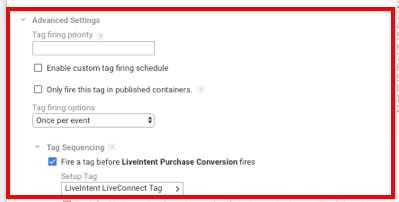
4. Select checkbox next to “Fire a tag before LiveIntent Purchase Conversion fires”
5. Choose ‘LiveIntent LiveConnect tag’
6. Under the Triggering section:
- Select Page View or Custom Trigger
- Include logic so the tag only fires on the conversion event (names of standard conversion events listed below)
LiveConnect: All other events
The implementation process for LiveIntent’s other standard event extensions are similar to implementation instructions for Product Page, Email sign up and purchase page.
- Please update the appropriate values per event type and set the firing logic to the appropriate page or event type.
Other Standard Events:
- product_purchase
- email_signup
- form_fill
- download
- viewCategory
- viewSearchResults
- addToCart
- removeFromCart