Ad Indicator Setup Guide
Including an advertisement indicator above email newsletter ad slots is a common practice. LiveIntent’s Ad Indicator allows users to set grayscale text above an ad slot that identifies the content as advertising. By enabling the Ad Indicator, publishers no longer need to hardcode a static indicator above an ad slot and can instead include it as part of the ad slot.
The following instructions will guide you on what to consider before updating newsletter ad slots to include the Ad Indicator and how to enable the Ad Indicator within your LiveTags.
Getting started
Before adding the Ad Indicator, it’s important to know how the indicator will appear and behave within the ad slot.
The Ad Indicator is:
- Available for both display and native LiveTags
- Can be applied to both new and existing ad slots
- Will always collapse with the LiveTag
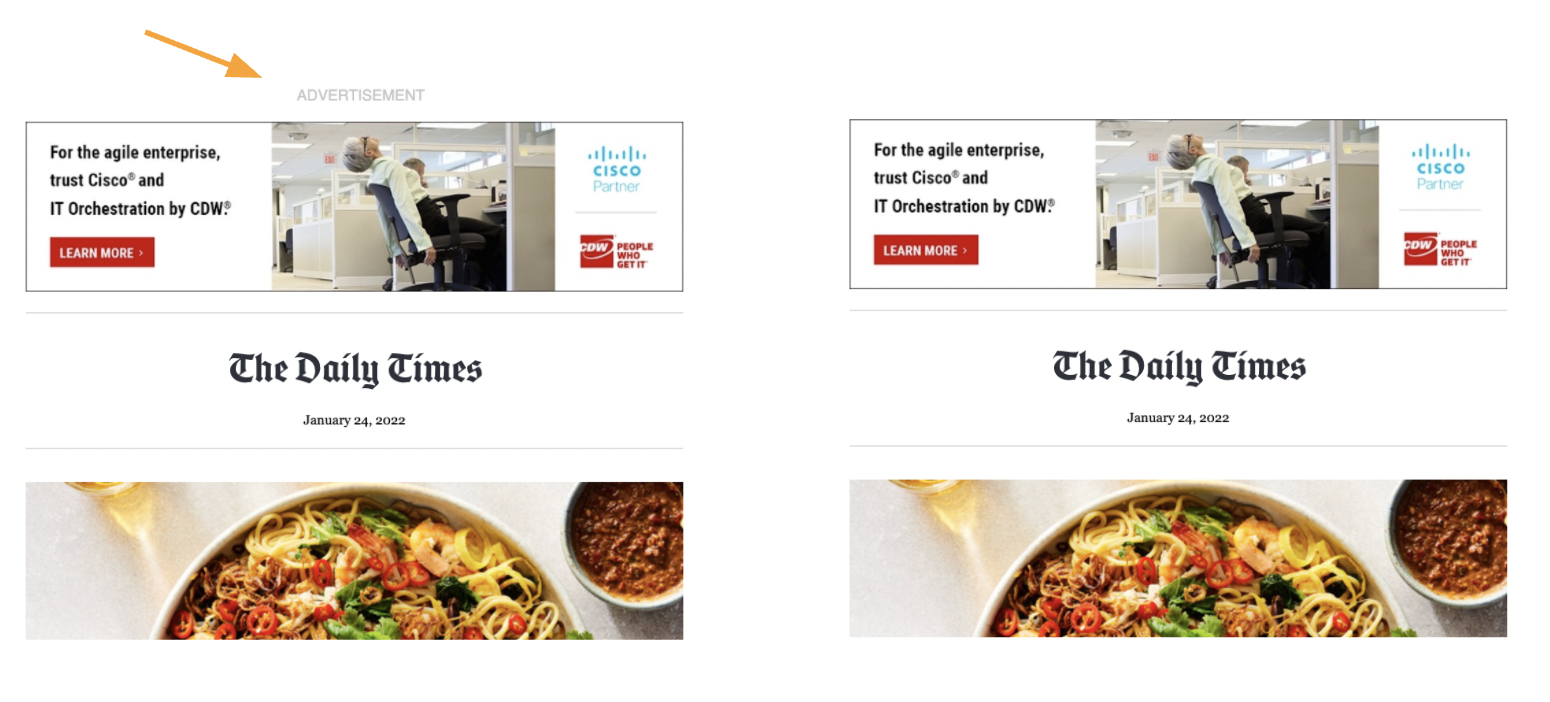
- Will always appear ‘centered and above’ the ad slot (example below)

- An image with a 12px height. This can be adjusted in your LiveTag code, if needed
- A transparent image with text using a #666 hex code. This color is static and cannot be adjusted
With these points in mind, the next step is preparing your newsletter for an indicator-enabled ad slot.
While enabling the Ad Indicator provides the convenience of the text-indicator being built into your ad slot, there are few necessary considerations to make before enabling the Ad Indicator. To prevent any disruptions to your newsletter experience, please follow the checklist below.
- Existing hardcoded indicators: Remove any existing hardcoded advertisement indicators from your newsletter template. This will prevent any duplicate indicators from appearing.

- Side-by-Side designs: If your template places content next to ad slots, make sure you add the appropriate padding to your template to account for the Ad Indicator. This will help ensure all content looks aligned.

- Gray backgrounds around advertising: Be sure to remove or adjust the CSS styling for any gray backgrounds placed around ad slots. LiveIntent’s Ad Indicator uses a #666 hex code and may blend into backgrounds that are similar to this color.

- Above-the-fold ad slots: Be sure you want to include an ad indicator for your topmost ad slots. You may not want this experience for your above-the-fold ad slots.
- Native ad slots: While the ad indicator is available for native ad slots, you may not want this included in your native experience. Native ads already include a ‘Sponsored By’ field identifying the content as an advertisement.

Once you have prepared your newsletter, you’ll be ready to pull the indicator-enabled LiveTags from the LiveIntent Platform.
Enabling the Ad Indicator
The Ad Indicator can be applied to both new and existing LiveTags. For the purposes of this walkthrough we will enable the Ad Indicator on an existing ad slot.
From within the LiveIntent Platform, navigate to the Inventory Manager.

From the Inventory Manager, select the newsletter containing the ad slot you wish to update.

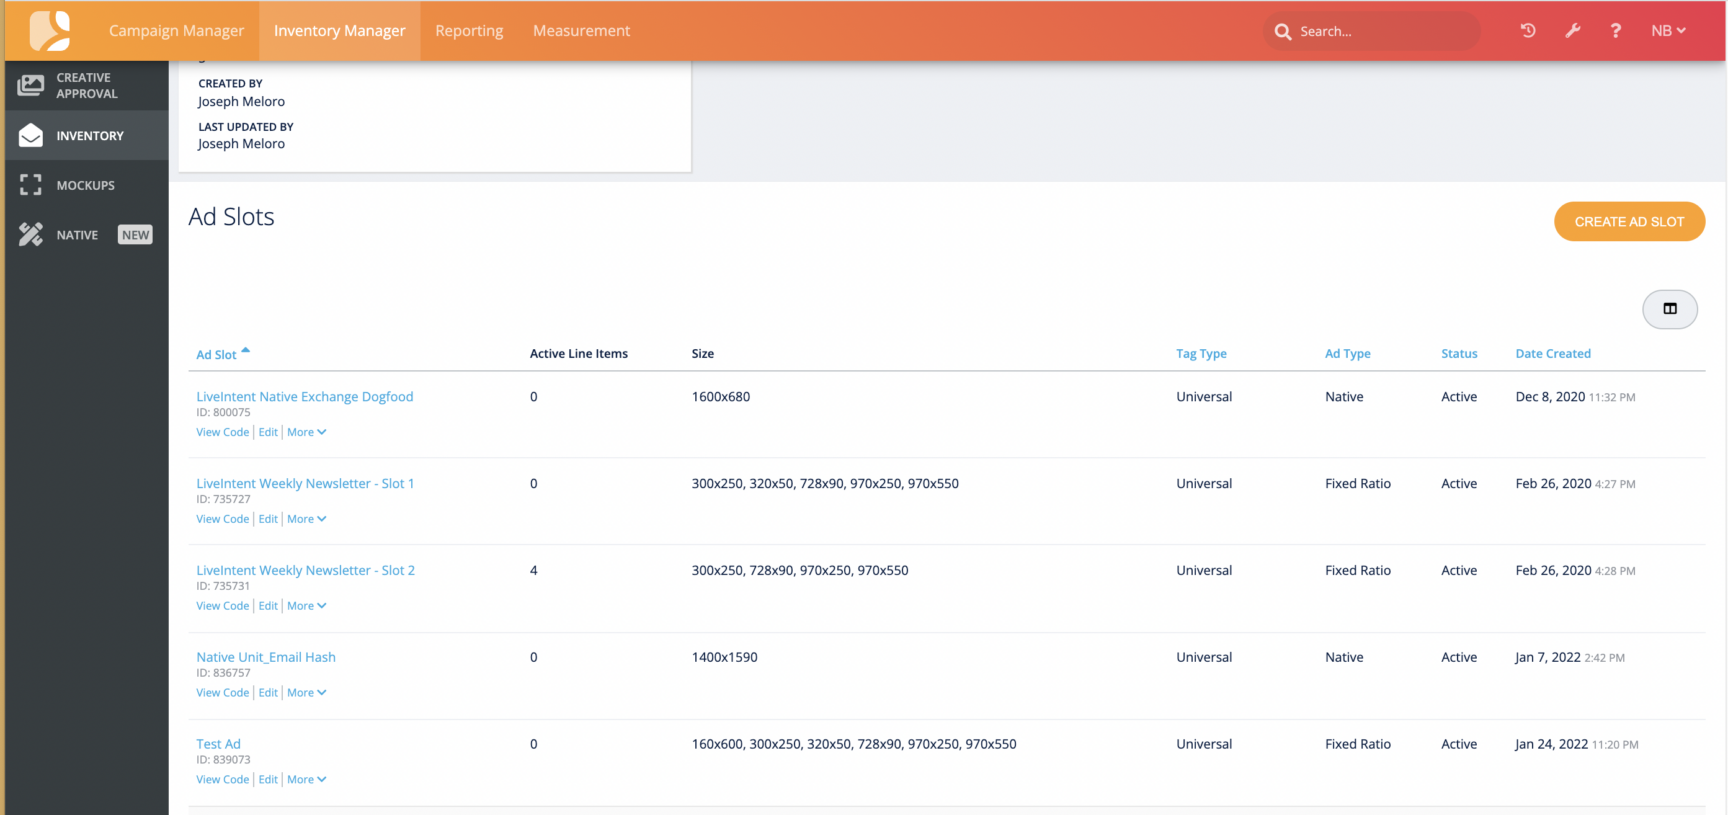
Once in the newsletter view, select ‘Edit’ beneath the ad slot you wish to update. This is next to the ‘View Code’ button.
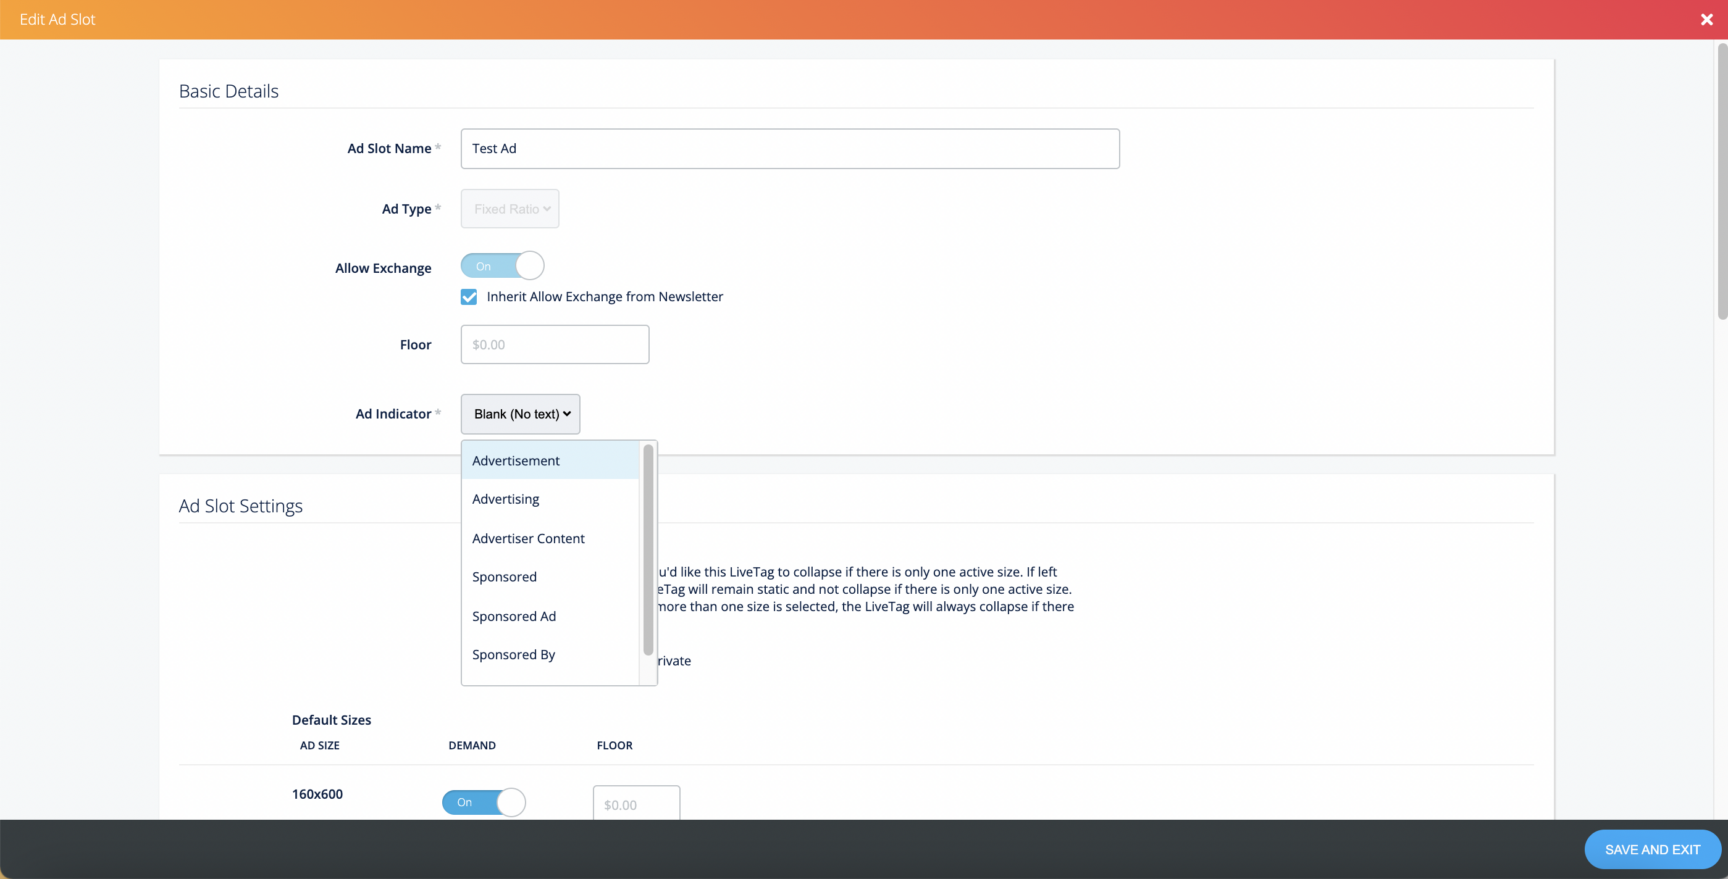
On the ‘Edit Ad Slot’ page you will see the ‘Ad Indicator’ button. The default setting is ‘Blank (No text)’. From the options available, choose the ad indicator text that works best for you. Then, select the ‘Save and Exit’ button to save your ad slot.
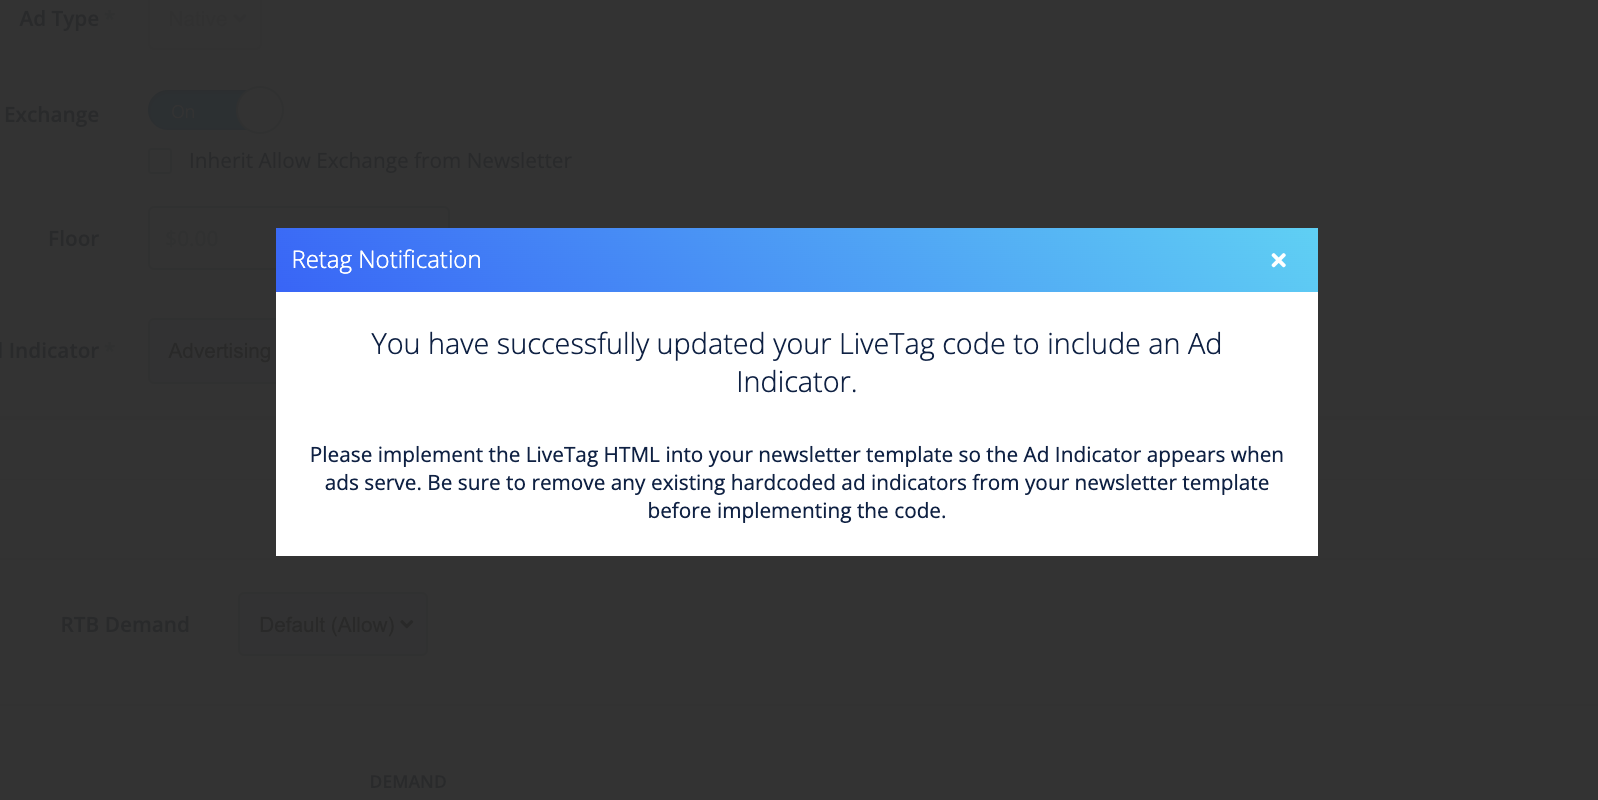
You will be shown the “Retag Notification’ to confirm that your ad slot has been successfully updated. It will also remind you to pull and implement the new LiveTag code into your newsletter template.
Pulling the LiveTag
Now you are ready to pull your indicator-enabled LiveTag for implementation into your newsletter. From the newsletter view, select the ‘View Code’ button for the indicator-enabled ad slot.
In the window that appears, you’ll see your LiveTag code. You can copy the code using the ‘copy button’ in the top right or select ‘Download All Tags’. Selecting ‘Download All Tags’ will download all newsletter tags in an Excel file. Each LiveTag as well as the SafeRTB tag will have its own row.
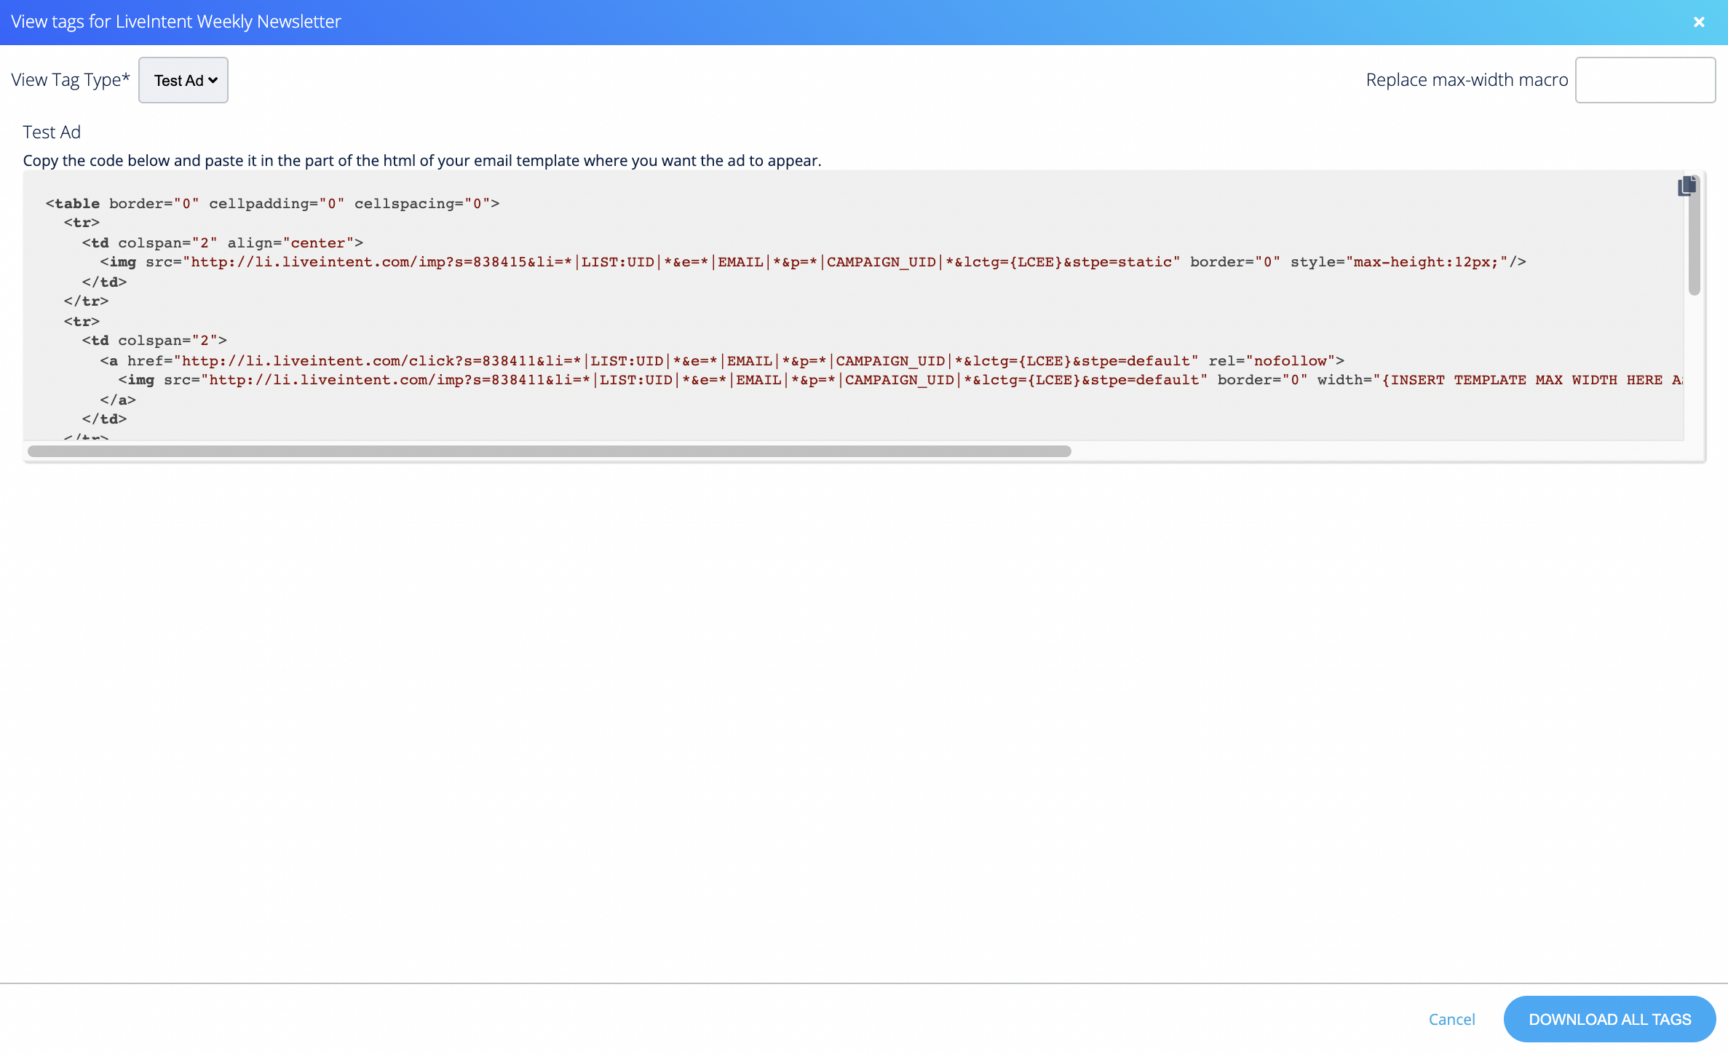
The bolded portion represents the Ad Indicator within the LiveTag code.

Now that you have your updated LiveTag code, please the LiveTag where you want the ad to appear within your newsletter template.
For guidance on how to implement Display and Native LiveTags, please refer to the following articles:
Sending a test
After implementing your updated LiveTag, send a test to your LiveIntentAccount Manager who will be in touch with you to confirm if the implementation was correct or if there were any issues.
If you have created a new ad slot, please send a live send directly to [email protected] to activate your new LiveTag.
Once the test email is sent, LiveIntent will run a script on each test email.
If the tags were implemented correctly, the ad slots will activate and you will receive an email.
If they were not, your Account Manager will be alerted and will work with you to quickly solve the problem.
NOTE: All sends to [email protected] should be a direct send from your ESP and not a forward, as this will cause issues with activation. Please DO NOT add [email protected] to your subscriber list.
Wrapping up
That’s it! If you have any questions during the Ad Indicator process please do not hesitate to reach out to your Liveintent Account Team.